Workshop 17: The Absolute Beginner’s Guide to JUnit in the Classroom
Background Preparation
Setting Up Your IDE for Using JUnit
In preparation for the workshop, we strongly recommend you configure your laptop with your IDE of choice to have JUnit ready for use. The instructions below show you how to setup JUnit in Eclipse, BlueJ, NetBeans, and JGrasp. The most recent versions of these systems come preconfigured with JUnit. Each environment, however, provides very different support for creating tests, executing tests, and managing your testing process. We have included instructions on how to run tests from the command line (shell), just in case you prefer the "traditional" way of things.
The goal of the workshop is to show you how to use testing in the classroom, and as such, we will focus on testing support that you can use in lectures, assignments or that your students will use in their class-related work. For more professional treatment of testing, check the Reference section to see other material.
Since most IDEs include support for JUnit, the jar files for JUnit are already included in your setup. Nevertheless, it is good to familiarize yourself with the online repository where JUnit lives and with the options for downloading JUnit directly. You can download JUnit from its home on the web (http://www.junit.org/). You can download it in zip or tar format or even just clone the project using git. Instructions for git are available on this page http://kentbeck.github.com/junit/. The JUnit home on SourceForge (http://junit.sourceforge.net/) has several good sources for learning JUnit, including release notes, a Cookbook, Javadoc, and frequently asked questions.
At the time of this writing, there are three main unit test frameworks for Java. In this workshop, we will use JUnit 3.8.
JUnit 3
This is the slightly older version of JUnit but the most popular version in many classrooms. For the education market, most textbooks are still using 3.x, so for this workshop will focus on 3.x examples. Code written for JUnit 3.x will run under JUnit 4, as the newer version includes support for the older tests. There is a separate Getting Started page for 3.8.
JUnit 4
Version 4 of JUnit makes use of Java Annotations to simplify the specification of unit tests. The annotations take the place of several conventions that were used in JUnit 3.x testing. JUnit 4 will still execute test cases and suites written using the JUnit 3 conventions. The Getting Started page for JUnit 4 has lots of information on how to use it.
Testing: The Next Generation
TestNG is a new framework inspired by JUnit that addresses some of the design limitations of JUnit. We will not be covering TestNG in this workshop. The website for TestNG has documentation and examples on how to use it. We will not cover TestNG but you should be aware of its availability and possible future popularity.
Unit testing in your IDE
Click the tab below to explore how to use JUnit in your IDE. For the examples, we use these two (overly simplified) classes: Student.java, and StudentTest.java. They are loosely based on sample code included in the Examples folder of the BlueJ distribution.
Testing in BlueJ
The current version of BlueJ (version 3.0.7), avialable at http://bluej.org, includes support for testing directly integrated in the IDE. If you have a recent version of BlueJ, you already have all you need to use JUnit. In BlueJ, you first create a test class, record your test cases (methods), and then execute either all of your test cases or individual test methods. The recording of the test methods allows the beginning student to capture testing expressions without having to know the syntax of JUnit. As they become familiar with JUnit's terminology, they can write their own test cases in the source code editor window, much like they write plain Java code.
The example below uses BlueJ 3.0.7. There is a tutorial online, available at http://www.bluej.org/tutorial/testing-tutorial.pdf, showing how to record and run test cases in BlueJ. The tutorial shows the interface of an earlier version of BlueJ but the steps are the same as the one shown below. We show some of the basics steps here, for more details follow the tutorial online.
Step 1. Bluej > Preferences
Make sure that the BlueJ testing tools are enabled, see Show unit testing
tools in the figure to the right. This is turned on by default in recent
versions of BlueJ.

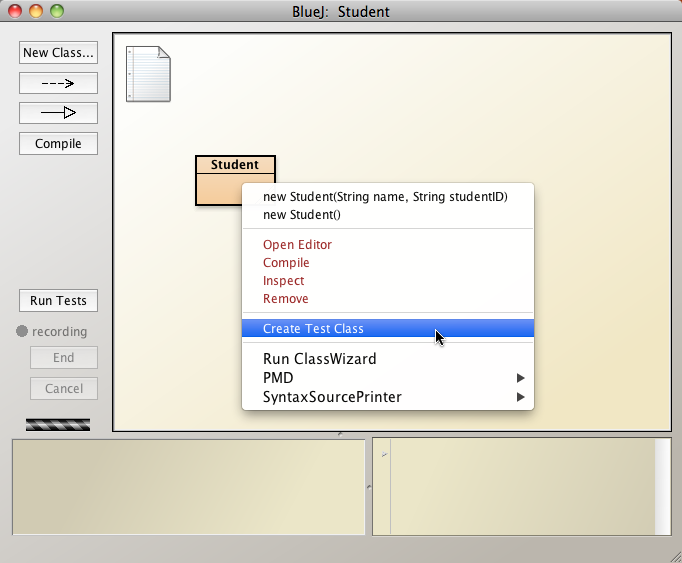
Step 2: Create test class
From an existing class, right click on the icon and select Create Test Class.
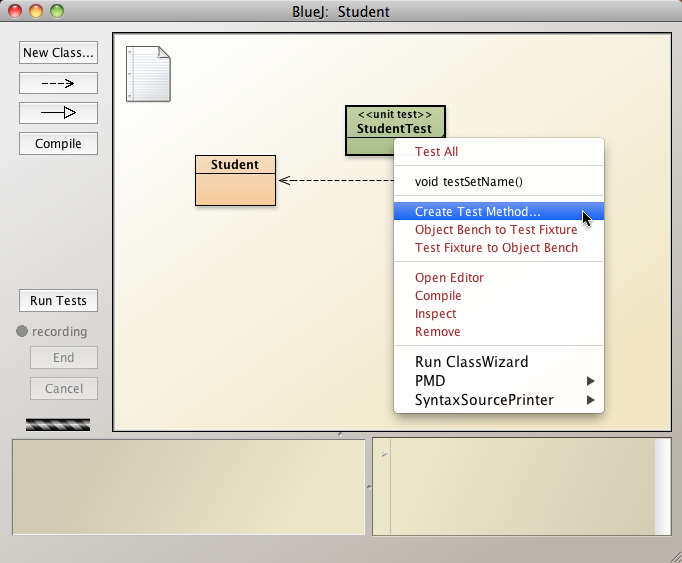
Step 3: Create a test method
Right-click on the StudentTest class and select
Create Test Method. This
command starts recording your actions and will lead to the creation of a
test method.
Step 4: Name the test method
All tests methods in JUnit 3.x have name of the form testXXX(),
where XXX typically the name of the method being tested.
Name this new method testSetName() as it will be testing
the setName() method of the Student class.

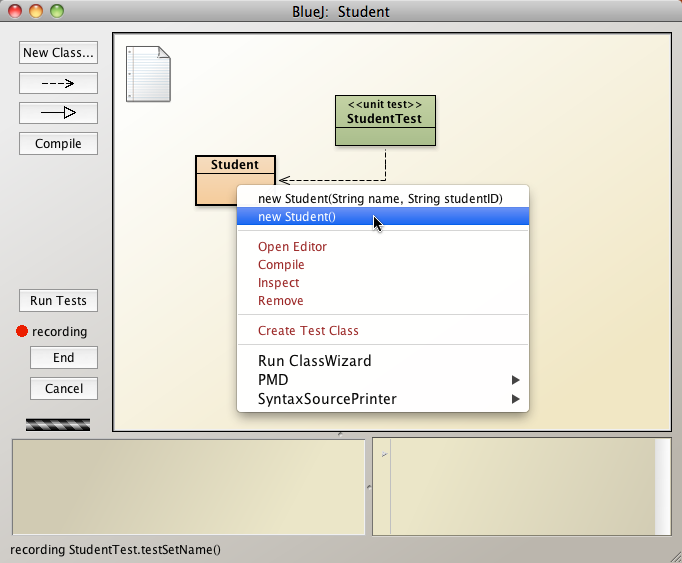
Step 5: Instantiate a Student
The next step is to instantiate an object of the class to be tested.
In this case, you instantiate a new Student by right-clicking on
the class icon and selecting new Student(). You will be
prompted for the name of the instance about to be created. The new
object appears as a red box on the bottom left of the window.
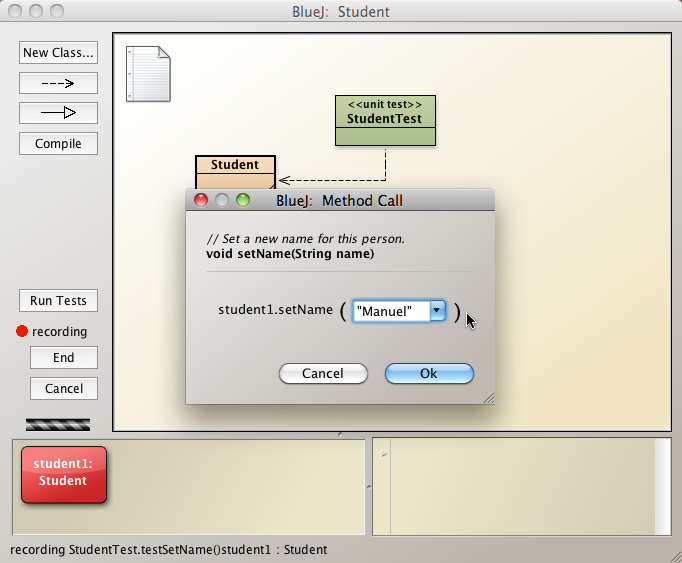
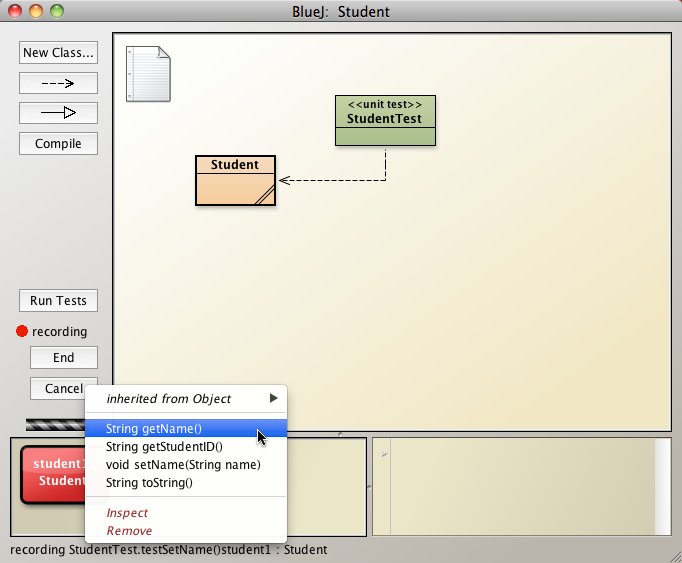
Step 6: Test the object
This step is where you create a test method by recording the steps required.
(a) Right-click on the object created on the previous step, and select
setName(). Because this method requires a parameter, you are
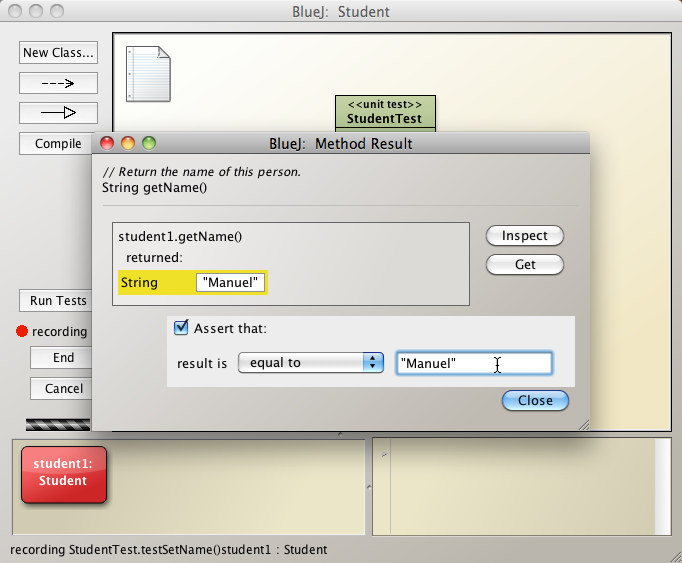
prompted to enter a string in (b). Then (c) call the getName()
method. The last step, shows what the call to getName() would
return. BlueJ gives you an option of stating what you were expecting (see d).
That expectation is stated as an assertion.

Step 7: End the recording
Upon completion of the previous step, press End to stop the
recording. BlueJ generate the test method named testSetName() with
the code inside that performs testing on the getName() method of
the Student class.

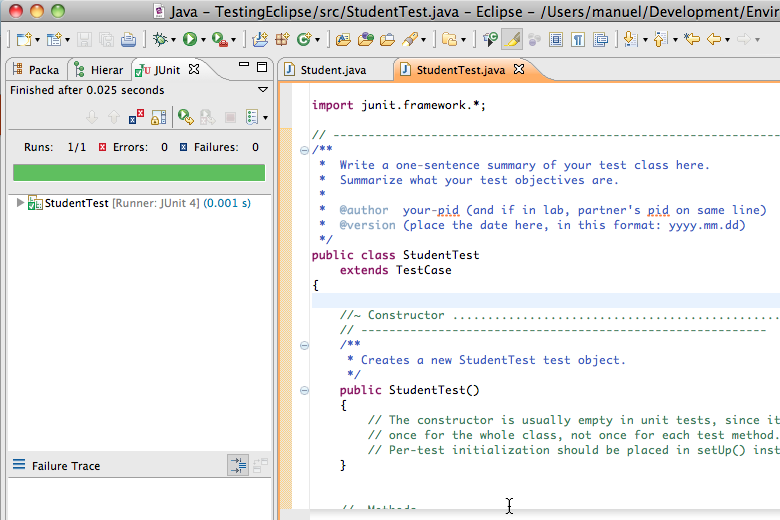
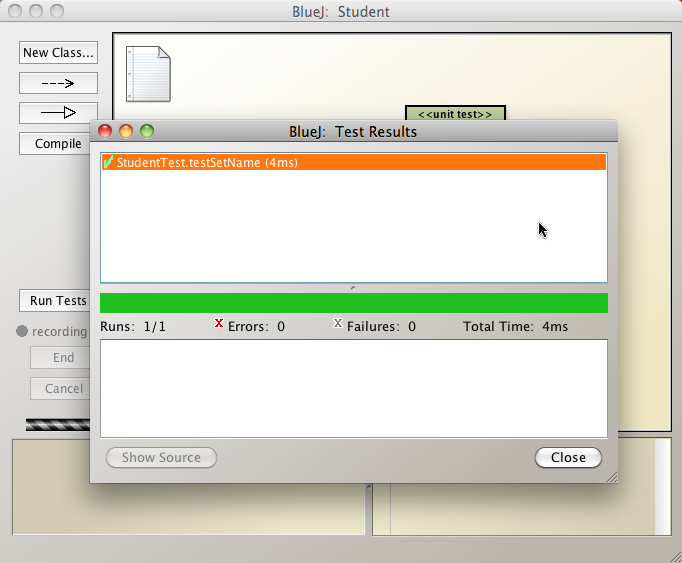
Step 8: Run the tests
After you create a test, you can run it individually or click the
Run Tests button on the left hand side. The figure to the right
shows the result of running all the tests in the class. In this example,
there is only 1 test and it was run with success.
Testing in the Command Line
Obviously, JUnit can be run from the command line. The only two steps needed are making sure your class path can find the JUnit.jar file and the command needed to run the test runner. The steps below show how to do this.
Step 1. Add JUnit.jar to CLASSPATH
Download the JUnit.jar from the JUnit home and place it in a location that makes sense for your computer configuration. Capture the path for that location and use it below.
Windows
set JUNIT_HOME=c:\Users\Name\Development
set CLASSPATH=%JUNIT_HOME%\junit.jar
Unix (Bash shell)
export JUNIT_HOME=/Users/Name/Development
export CLASSPATH=$JUNIT_HOME/junit.jar:$CLASSPATH
Step 2. Compile your files
With the definitions from above, you can now compile your source files and your test classes.
% javac Student.java StudentTest.java
Step 3. Run your test cases
Use the JUnit test runner to run your test cases. The output will show information about which test cases passed and which failed.
For more information on how to run the command line test runner, check http://junit.sourceforge.net/doc/faq/faq.htm#running_1. There is also information on that page about how to run JUnit from Ant.
% java org.junit.runner.JUnitCore StudentTest
Testing in JGrasp
The most recent version of jGrasp (1.8.8) introduced a JUnit plugin. If you are using that version, then you do not need to do anything to configure jGrasp to use JUnit. But if you have an older version, you need to add the JUnit jar file to the CLASSPATH.
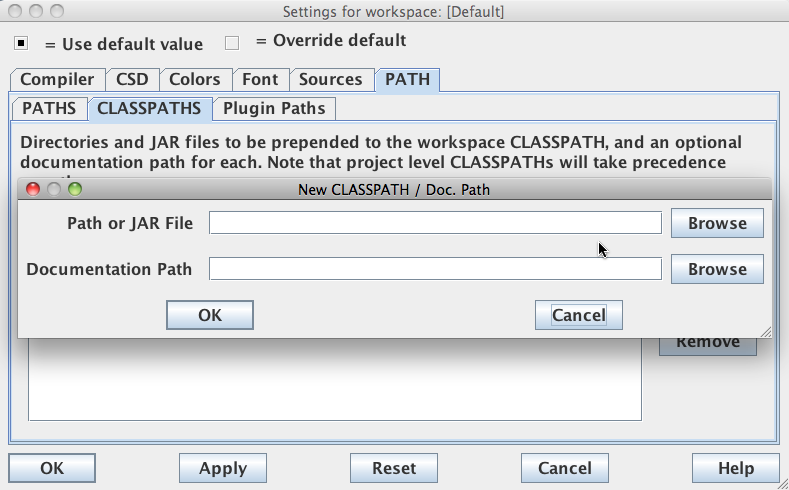
Step 1. Add JUnit.jar to CLASSPATH
(a) Click Settings > PATH/CLASSPATH > Workspace. Then click (b) CLASSPATHs tab followed by the New button. Click New and find the desired junit.jar using the open file dialogue box. Once the file is selected, click OK, followed by (c) Apply on the outermost window.


ApplyStep 2. Create a project and proceed as usual.
To run your test cases, create a test suite and simply run your test case file
as a standalone main program. The code on the right shows the
static void main that creates a testing suite and adds and
instance of the StudentTest class. Running StudentTest.class as a standalone
project, causes the StudentTest to be run.
import junit.framework.*;

public class StudentTest extends TestCase
{
  public static void main (String[] args) {
    TestSuite suite = new TestSuite();
    suite.addTest(new StudentTest());
    junit.textui.TestRunner.run (suite);
  }

  public void testName()
  {
    Student student1 = new Student();
    student1.setName("Manuel");
    assertEquals("Manuel", student1.getName());
  }
}
Testing in NetBeans
The most recent version of NetBeans is 7.1. The example below works for versions 6.9/7.0/7.1. You can download the most recent version from http://netbeans.org/ A tutorial for writing JUnit tests in NetBeans is available at this location http://netbeans.org/kb/docs/java/junit-intro.html.
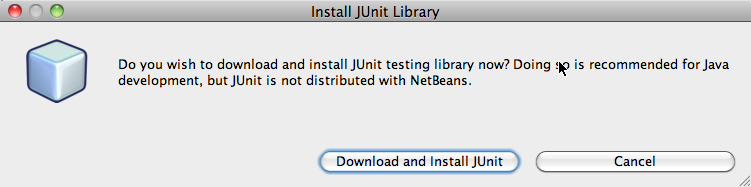
Step 1. Install the JUnit Plugin
The new JUnit plugin (version 1.1 of the plugin) includes support for JUnit 3.x and 4.x. Once you create a new project, the new NetBeans offers to download and install the JUnit plugin automatically. Go ahead and install it.
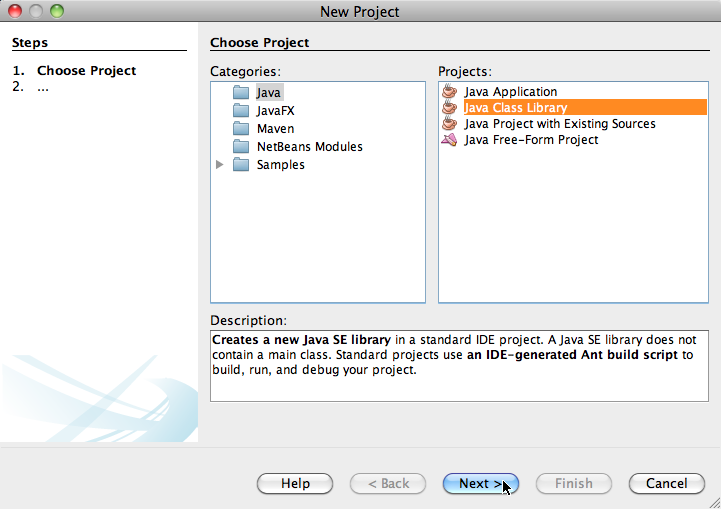
Step 2. Create a class
From the File menu, create a new Project. Select Java in
the Categories panel followed by
Java Class Library on the right panel. You can
create the class and accept the default options. In this example,
we use Student as the class name.
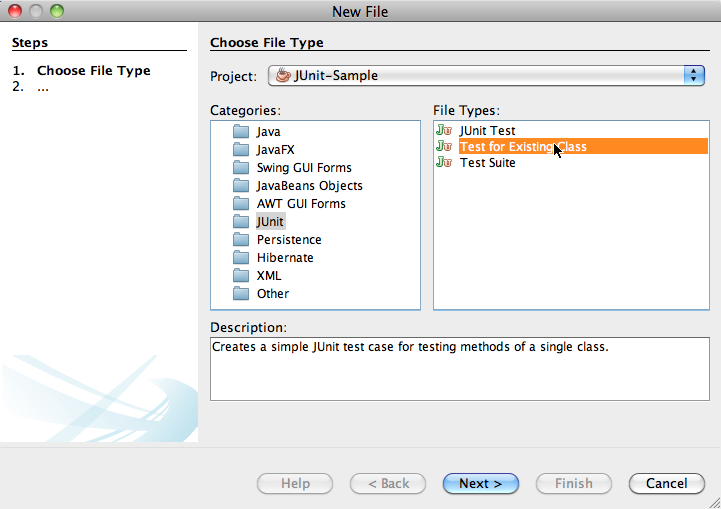
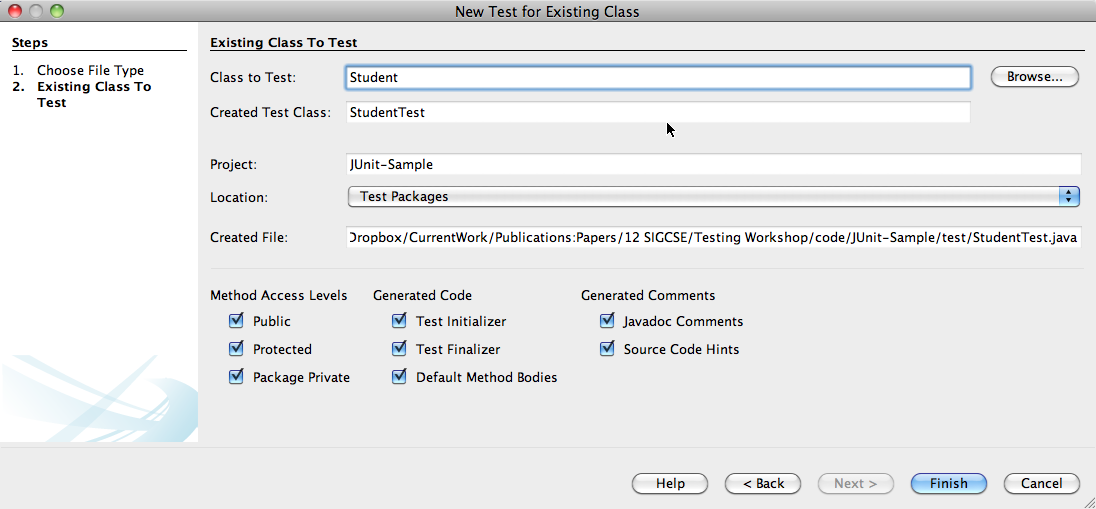
Step 3. Create a Test class for an existing class
Next, lets create a test class for an existing class.
First, create a new file, as in Step 2 above, but select
JUnit on the Categories panel and
Test for Existing Class on the
right panel.
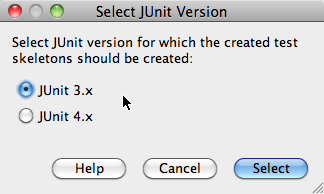
Step 4. Select class options
Enter the name of the class to test (or click browse and select it from a
list of available classes). Next, indicate which JUnit version you will
use. For this workshop, we are using JUnit 3.x. Now you
are ready to use
NetBeans to develop in Java and write JUnit test cases.
Testing in Eclipse
The home page for the Eclipse project is at http://www.eclipse.org/.
The current version of Eclipse is Indigo (3.7.1)
and it includes support for JUnit testing. We
use the Eclipse IDE for Java Developers but the one for Java EE Developers
should also work well for the purposes of our workshop.
Download the appropriate version for your operating system from
http://www.eclipse.org/downloads/.
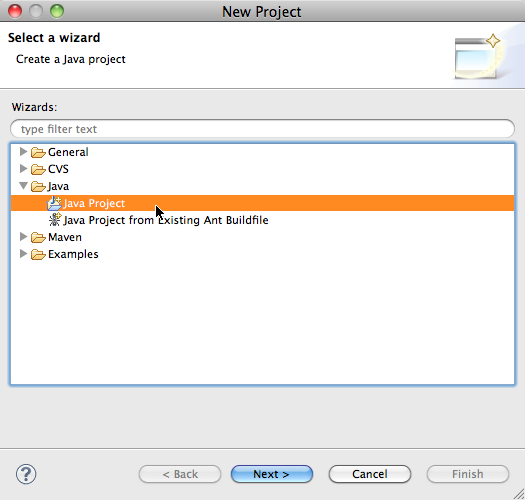
Step 1. Create a new project
Create a new Eclipse project selecting File > New > Project. This will bring up a wizard that guides you through the
creation of the project. (a) You first must select that you want a
Java Project. Click Next.
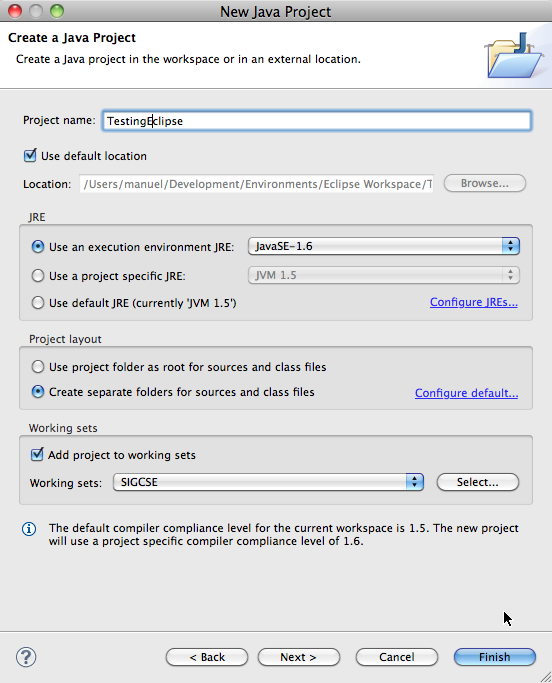
(b) Then
you specify the name of the project, and some of the other options.
Use TestingEclipse for name and select the JavaSE-1.6 as
JRE.
Click Next.
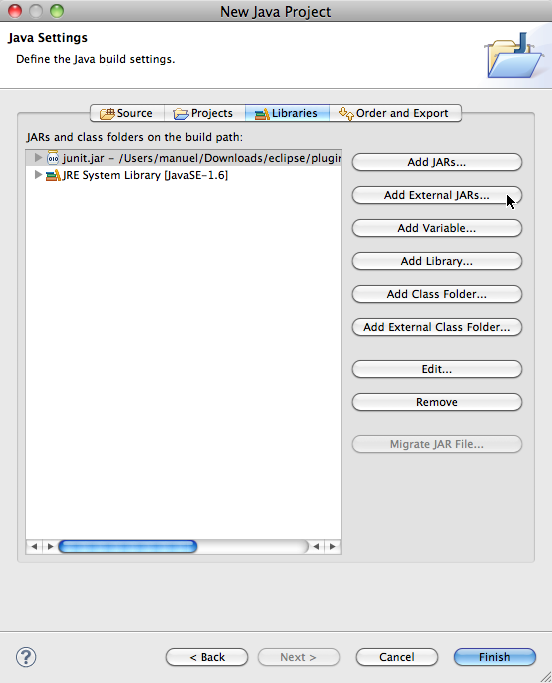
(c) Finally, you just add the junit.jar to
the project. Click the Libraries tab at the top, and
click Add External JARs... on the right. Then find
the folder named "plugins" that is in the Eclipse folder. That
folder will have several versions of JUnit (3.8, 4.x, etc.).
Find the JUnit.jar in the 4.x folder and add it to your project.
Click Finish.
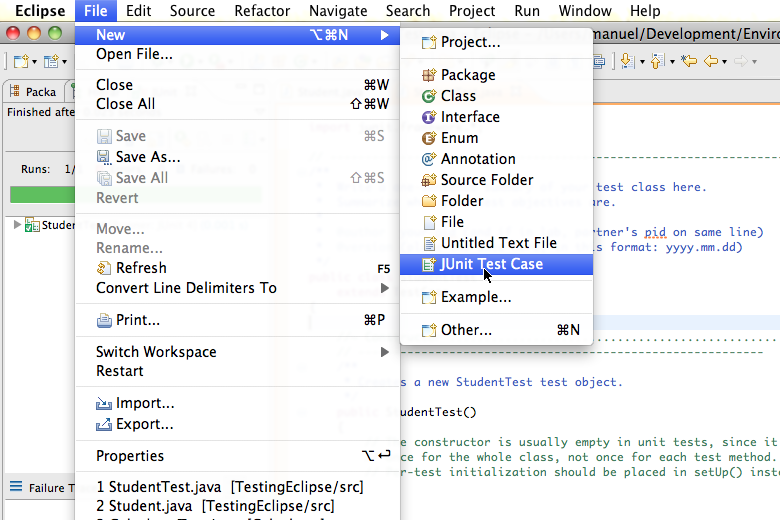
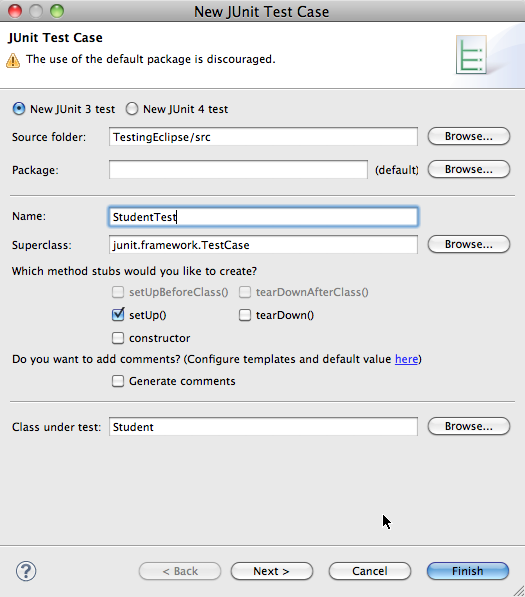
Step 2. Create a test case for your class
Next you can create a Java class following your normal use
of Eclipse. We will assume you have created a Student.java
class using the code linked above.
(a) Then select File > New > JUnit Test Case
and another wizard will guide you through the steps.
(b) Enter the name StudentTest and at the bottom click
Browse to select the Student class as the
class to be tested. Click Finish.
Step 3. Test created for you
The unit test created is shown on the right. Note that the
code for the testSetName() simply has a fail()
method call. This test case when run will always fail.
Eclipse prepares the shell for JUnit test cases, the contents
of the test case is up to you to fill in.
import junit.framework.*;

public class StudentTest extends TestCase
{
  protected void setUp() throws Exception
  {
    super.setUp();
  }

  public void testSetName()
  {
    fail("Not yet implemented");
  }
}
Step 4. Running your test cases
To run your test cases, (a) you select Run As > JUnit Test.
This will attempt to run your project's test cases. The result of running your
test cases is shown in Eclipse (b) indicating how many of your test cases
passed or failed.